MyMuse comes with several types of plugins.
Under Mymuse there are plugins for payments, shipping, discounts, orders, shoppergroup, audio previews, video previews, social share and a vote plugin.
Under User there are plugins for shopper profiles and redirect to cart.
Under Search there is a search plugin.
MyMuse Plugins Screenshot

Payment Plugins
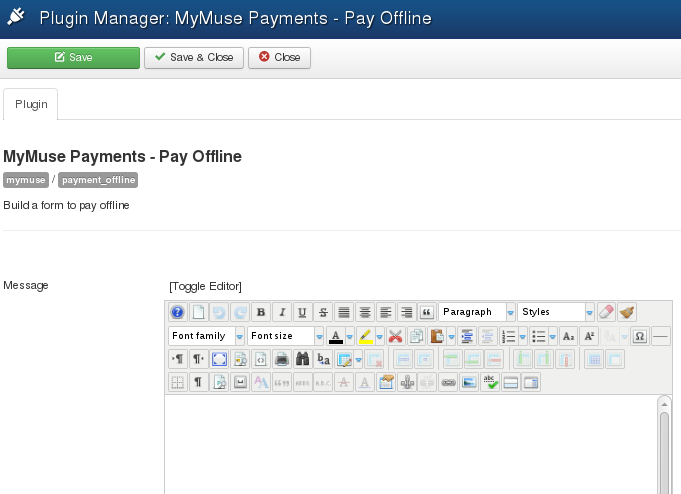
Pay Offline
You can offer the option to pay offline, and confirm the order when the payment arrives, by publishing this plugin.
Options
- Message: an optional message to display beside the Pay Offline button.
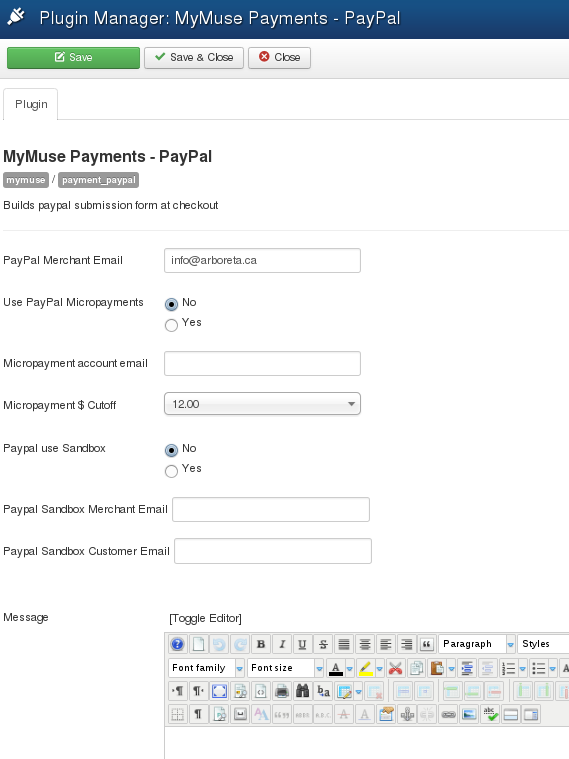
Payment PayPal
Offer an option to pay at PayPal by publishing this plugin.
Options
- PayPal Merchant Email: your main PayPal email
- Use PayPal Micropayments: A micropayment Account gives a better deal on small payments. If you have two accounts, one as your main PayPal and one as your Micropayment Account, choose Yes here.
- Micropayment account email: enter your Micropayment Account email here.
- Micropayment $ Cutoff: The top amount that should go to the MicroPayment Account
- PayPal use Sandbox: Test PayPal in their Sandbox.
- Paypal Sandbox Merchant Email: Sandbox merchant email.
- PayPal Sandbox Customer Email: Optionsl Sandbox customer email.
- Message: A message to include in email to the customer
Payment PayPal Pro (Direct Payment)
The customer enters their credit card information on your site. The payment to Paypal is made "behind the scenes" and customers are redirected to the thank you page.
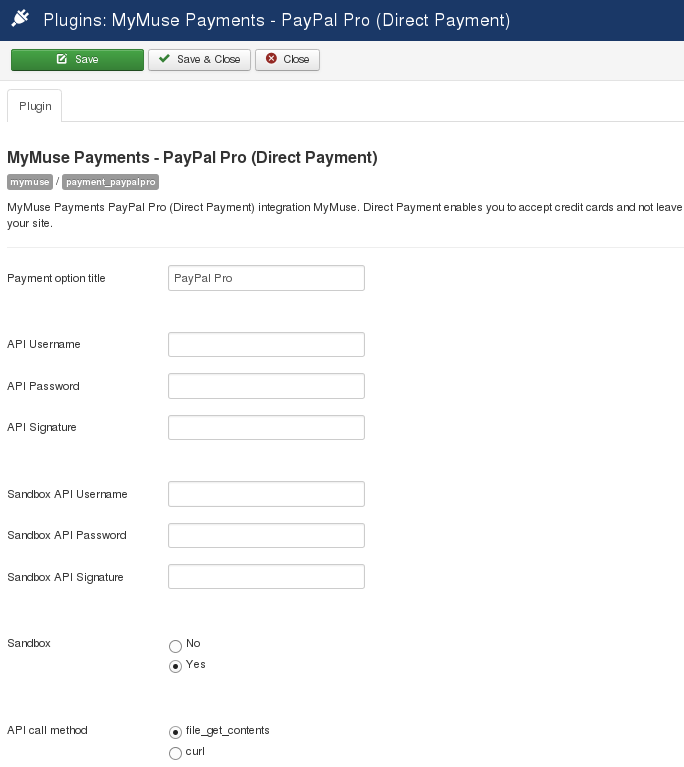
- Payment Option Title: The title that appears on the top of the payment page.
- API Username: as created at PayPal.
- API Password: as created at PayPal.
- API Signature: as created at PayPal.
- Sandbox API Username: as created at PayPal.
- Sandbox API Password: as created at PayPal.
- Sandbox: API Signature: as created at PayPal.
- Sandbox: Yes or No to use the sandbox.
- API call method: file_get_contents or curl. If one does not work on your host, try the other.
- Messaage: A message to include in order emails to the customer.
Payment PayPal Express Checkout
The custoemnr is sent to Paypal to login in, check their account such as shipping address. Payment is made "behind the scenes" from their PayPal account and they are redirected to the thank you page.
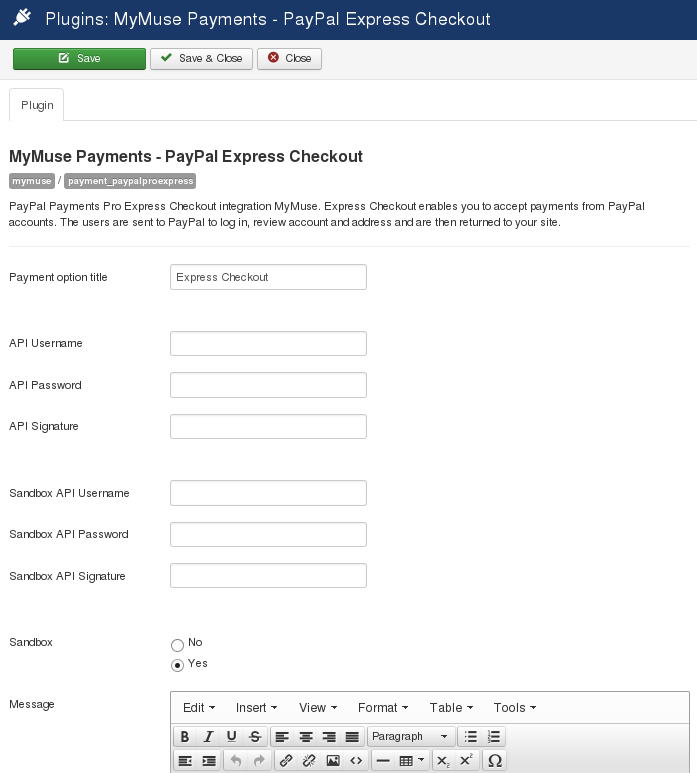
- Payment Option Title: The title that appears on the top of the payment page.
- API Username: as created at PayPal.
- API Password: as created at PayPal.
- API Signature: as created at PayPal.
- Sandbox API Username: as created at PayPal.
- Sandbox API Password: as created at PayPal.
- Sandbox: API Signature: as created at PayPal.
- Sandbox: Yes or No to use the sandbox.
- Message: A message to include in order emails to the customer.
Payment Moneybookers
Offer an option to pay at MoneyBookers by publishing this plugin.
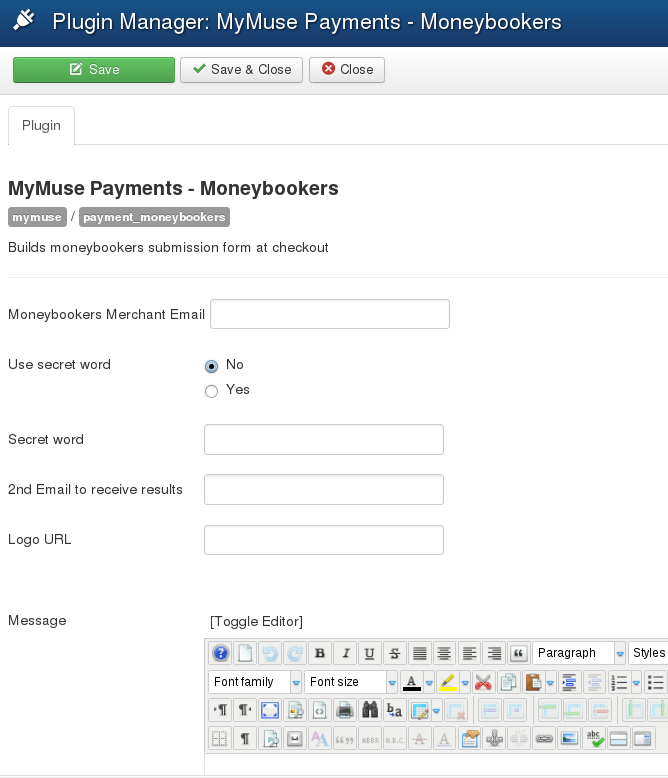
Options
- MoneyBookers Merchant Email: your MoneyBookers email.
- Use secret word: Yes/No use a secret word you have entered at MoneyBookers.
- Secret word: The secret word.
- 2nd Email to recieve results: Send results to a second email.
- Logo Url: Must be on a secure server using https.
- Message: A message to include in email to the customer
Payment Monsterpay

Payment PayUnity
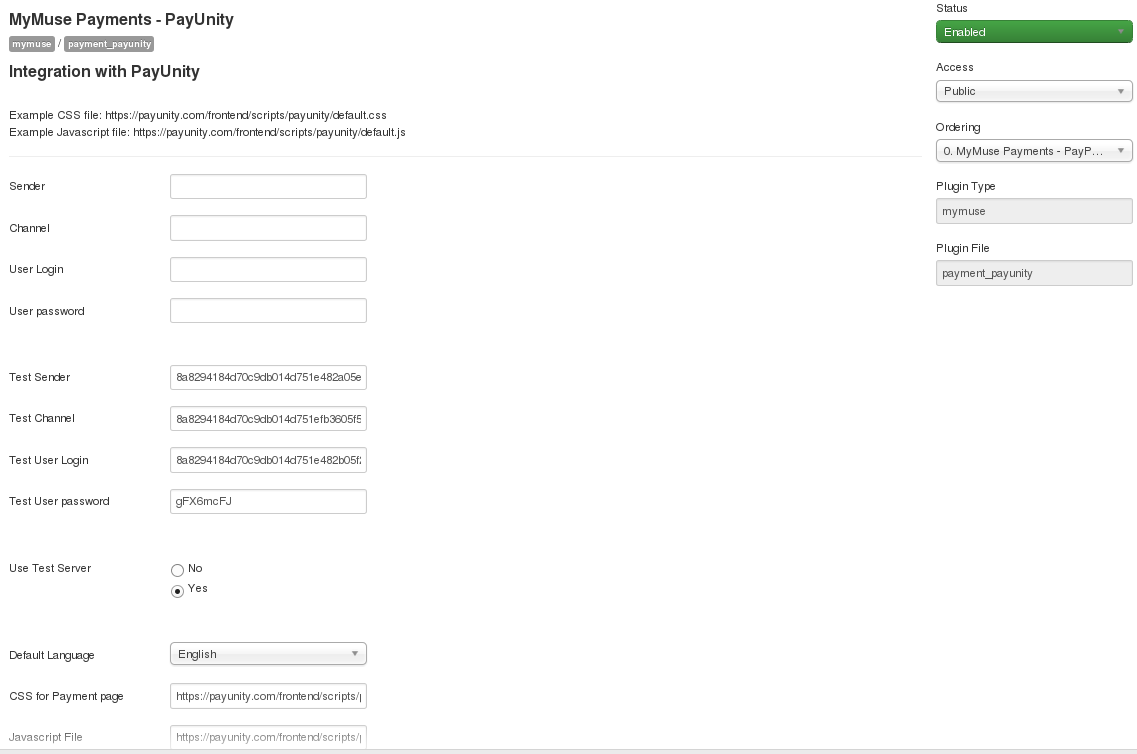
- Sender: Sender code you were provided at PayUnity.
- Channel: Channel code you were provided at PayUnity.
- User Login: User Login from PayUnity.
- User password: Password from PayUnity.
- Test Sender: Sender code you were provided at PayUnity.
- Test Channel: Channel code you were provided at PayUnity.
- Test User Login: User Login from PayUnity.
- Test User password: Password from PayUnity.
- User Test Server: yes of no.
- Default Language: One of the European languages.
- CSS for Payment page: Include a full link to a css file to include on the payment page.
- Javascript File: Include a full link to a javascript file to include on the payment page.
Payment Payfast
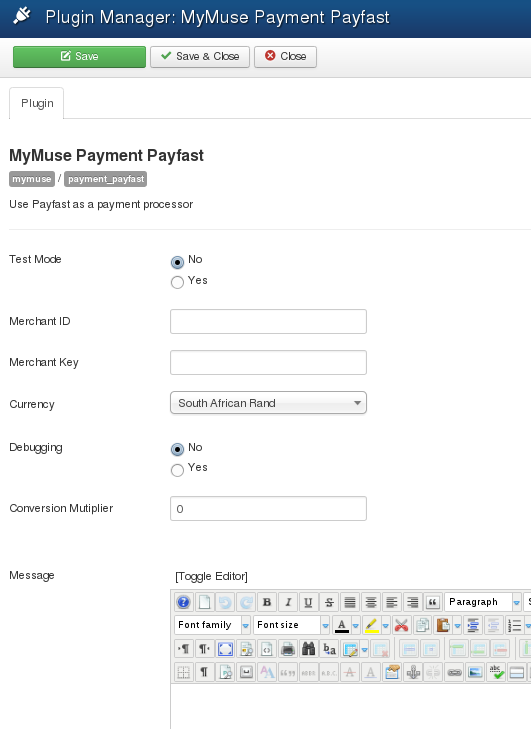
- Test Mode: Check this to put the interface in test mode
- Merchant ID: Your Merchant ID as given on the Integration page on PayFast
- Merchant Key: Your Merchant Key as given on the Integration page on PayFast
- Currency: Payfast only deals in South African Rand: ZAR
- Debugging: Check this to turn debugging on
- Conversion multiplier: If you use another currency as your base currency, enter a multiplier to convert to ZAR.
- Message: A message to include in email to the customer
Virtual Merchant
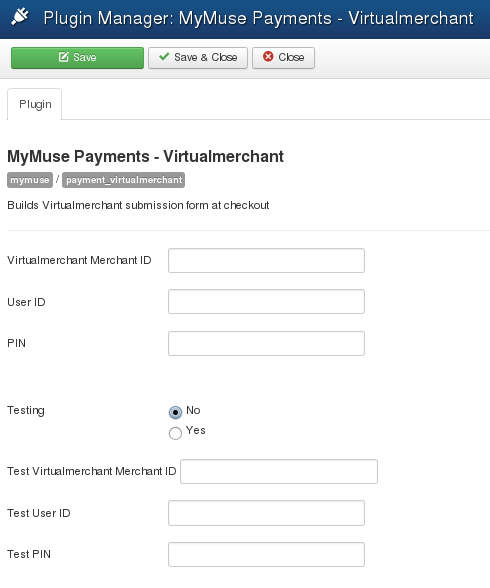
- Virtual Merchant ID: Id for payment processor
- User ID: The User ID that we tell Virtualmerchant to use
- PIN: This PIN set up at Virtualmerchant
- Testing: Test Environment at Virtualmerchant
- Test Virtualmerchant ID: Test Id for payment processor.
- Test User ID: The Test User ID that we tell Virtualmerchant to use
- Test PIN: This Test PIN set up at Virtualmerchant
Shipping Plugins
Shipping Standard
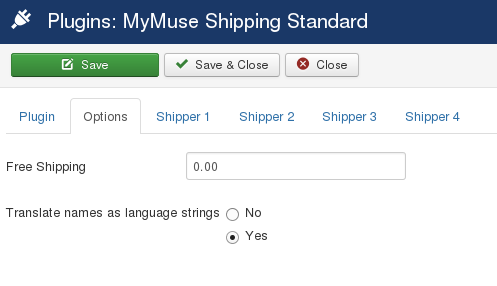
OPTIONS
- Free Shipping: set a price so that shipping is free after that price.
- Translate names as language strings: The Ship Carrier Name and Ship Method Name will be translated. You will have to include the translations in the plugins language files. For example
/administrator/language/en-GB/en-GB.plg_mymuse_shipping_standard.ini
/administrator/language/fr-FR/fr-FR.plg_mymuse_shipping_standard.ini
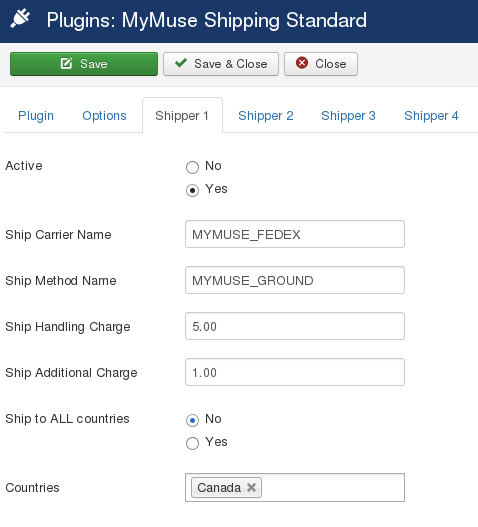
Options: Set up to three different shipping choices to present the customer. Each one has the following options.
- Active: Yes/No.
- Ship Carrier Name: example - Fedex.
- Ship Method Name: example - Ground
- Ship Handling Charge: Charge for the first item.
- Ship Additional Charge: Charges for each additional item.
- Ship to ALL countries: Yes or No. If no, then this shipping method is only for the countries listed below. If Yes, then countries listed below will be EXEPTIONS (All countries EXCEPT the ones below)
- Countries: choose which countries to ship to or NOT ship to for this method.
Shipping Price
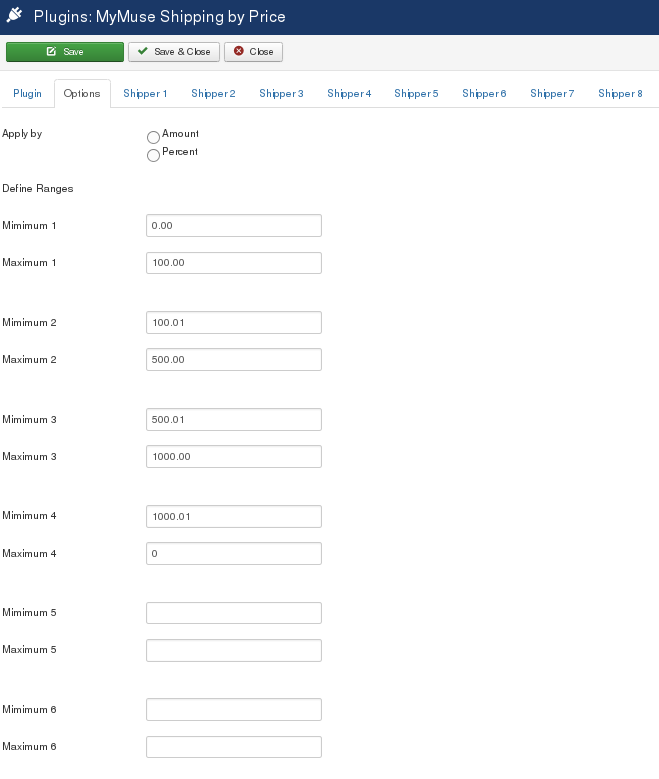
Options: Charge a percentage of the total or a fixed amount, when the price falls between different ranges.
Up to 12 ranges per shipper..
- Apply by: amount/percent. Shipping will be an amount per option or a percentage of the cart total per option
- Mimimum1: Define ranges for the cart total. Ex: 0 - 100
- Maximum1: Top of a range. Up to 12 ranges.
Shippers: define up to 8 Shippers.
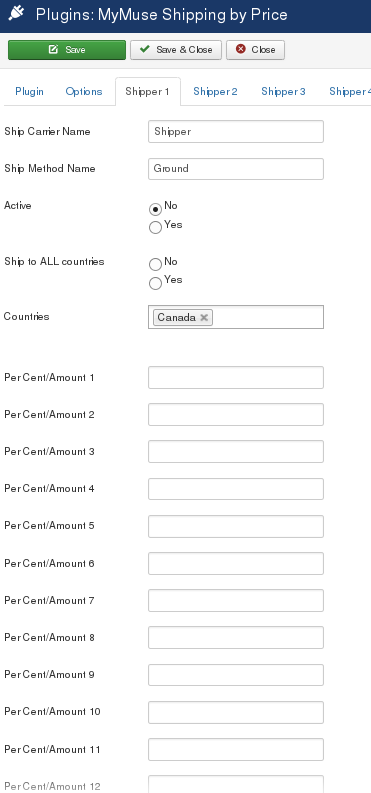
- Ship Carrier Name: The name of the shipper. Ex. UPS
- Ship method Name: The name of te method. Ex. Overnight
- Active: Yes or No
- Ship to all countries: Yes or No. If No, only apply to the countries below. If Yes, apply to all countries EXCEPT the ones listed below.
- Countries: Countries to ship to, or NOT ship to with this Shipper.
- PerCent/Amount 1: The percentage or amount to charge for this range.
- PerCent/Amount 2 ... 12: Up to 12 ranges per shipper.
Audio Previews
Note that we try to offer three types of views with each audio player: one player for each, one player for all and playlist. This type can be set globally in the component Options and set individually by menu.
- One Player for each: Each track gets its own player.
- One Player for all: (Recommended) A player is presented above the tracks table and each track gets a "Play" button.
- Playlist: The player appears above the tracks table with a clickable list of the tracks below it.
Audio HTML5
Use JPlayer to present your previews using HTML5. For browsers that do not support your previews it will fall back to a flash player. We suggest you upload mp3 and ogg versions of your previews to cover almost all browsers, the rest should be able to play the flash version. More information on HTML5 is available here. The Jplayer can be styled using css files in plugins/mymuse/audio_html5/skins
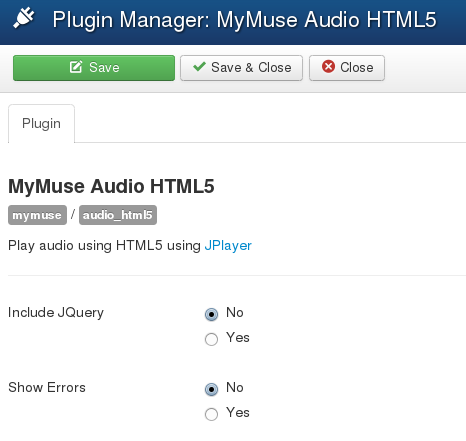
Options
- Include JQuery: JPlayer requies jquery javascript library be loaded. Joomla 3.x loads Jquery itself so you should not need this.
- Show Errors: The JPlayer has an element called "Jplayer Inspector" that can be shown by turning on "Show Errors"
The JPlayer

Audio MP3 Player DewPlayer
A Flash player from Alsa Creations.
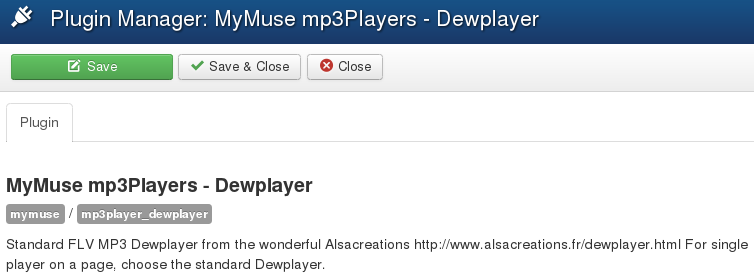
There are no options with this player.
Playlist example.

Audio MP3 Player Flowplayer
Flash from Flowplayer.org. There ae many options available for anyone who wants to edit the javascript in plugins/mymuse/mp3player_flowplyer/mp3player_flowplayer.php
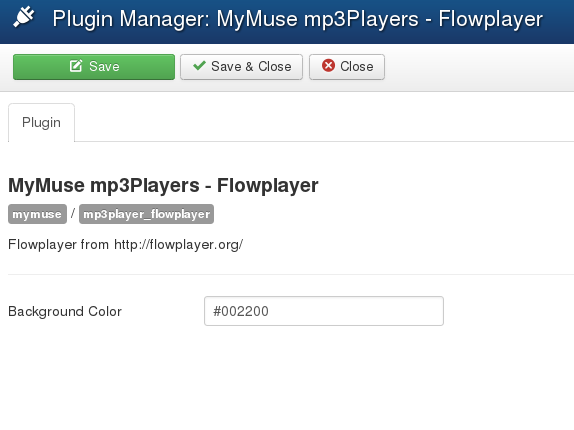
Options
- Background Color: set the background color in hexadecimal.

Video Previews:
Video HTML5
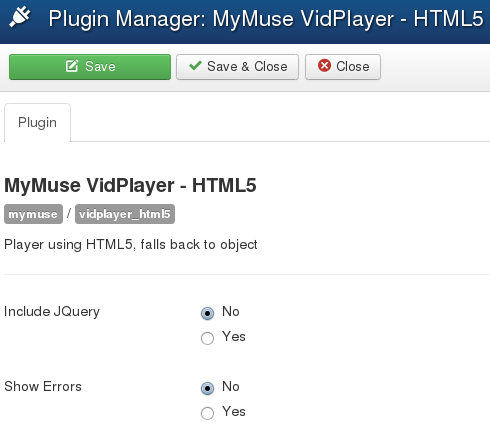
Options
- Include JQuery: Joomla 3 loads Jquery itself, so this should not be necessary.
- Show Errors: Turns on the JPlayer inspector at the bottom of the player and shows any errors.
The JPlayer video player
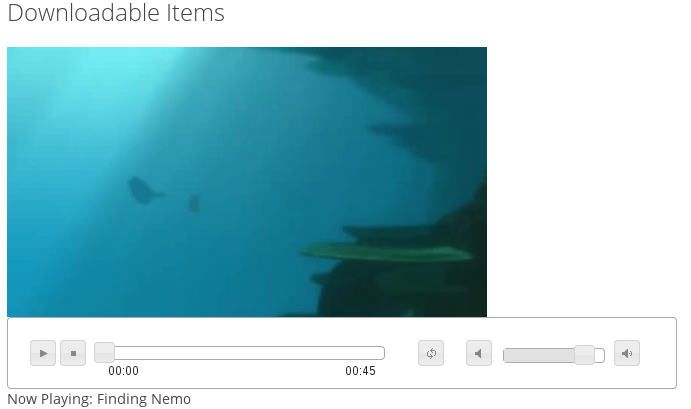
Video Flash Player DewPlayer DewTube
To have a 'poster' of the movie, the graphic that displays before the movie is played, you must save the image at the same size as the movie
and save it to the same preview directory the movie is in. Example: movie is images/A_MyMusePreviews/nature/lakes/lake_scene.flv, save the track 'Detail Image' as
images/A_MyMusePreviews/nature/lakes/lake_scene.jpg
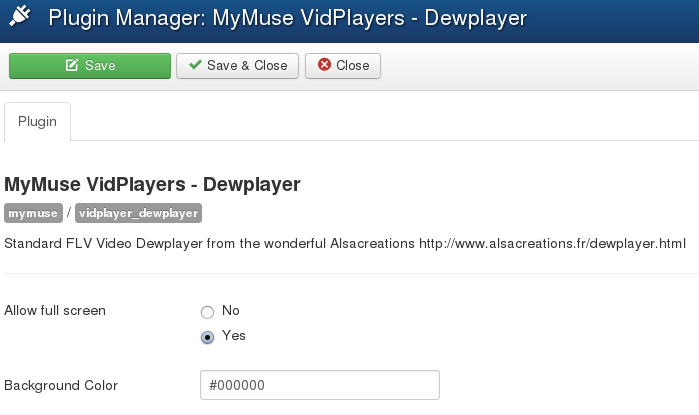
Options
- Allow Full Screen: Let the user choose a full screen display.
- Background Color: Set the default background color.
Screenshot with the menu's Product Options->'Player Type set to "Playlist"

Video Flash Player Flowplayer
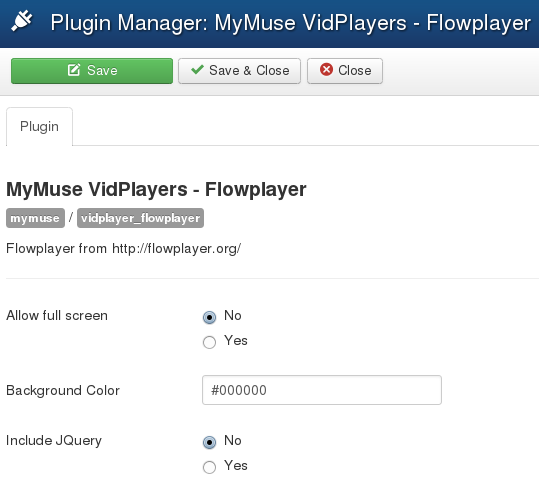
Options
- Allow Full Screen: Let the user choose a full screen display.
- Background Color: Set the default background color.
- Include JQuery: Include JQuery yes/no. Joomla 3 loads this already.
Screenshot with the menu's Product Options->'Player Type set to "One Player For Each".

Miscellaneous:
Preorder
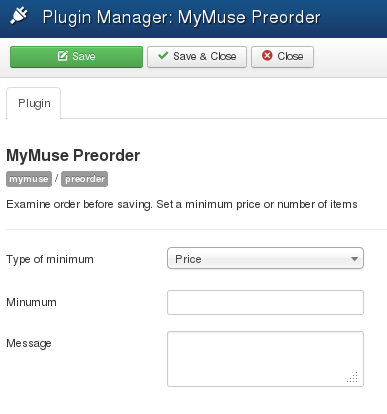
- Type of Minimum: Choose Price subtotal or number of items.
- Minimum: Minimum price or number of items.
- Message: Message to send if minimum not met. Will be wrapped in JTEXT so you can translate it in lanuage files.
Vote
- There are no options. Enable voting or not.
User Plugins:
User MyMuse Profile
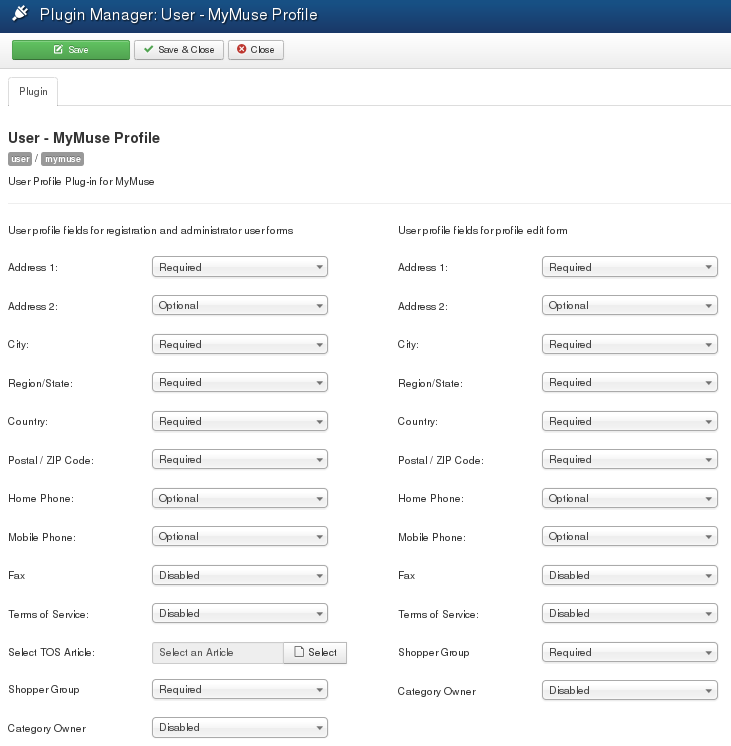
There are two groups of fields: one for Registration and admin user forms, the other for the Profile Edit Form.
Fields can be Required, Optional or Disabled.
Special fields are:
- Shopper Group: you can create different shopper groups with different discouts and assign shoppers to different groups.
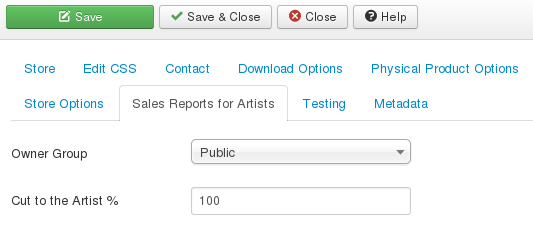
- Category Owner: You can assign a shopper to be a Category Owner. If you have a menu for MyMuse Artist Sales Reports, this shopper can view the sales reports of the specified category.
User - MyMuse No Registration Profile
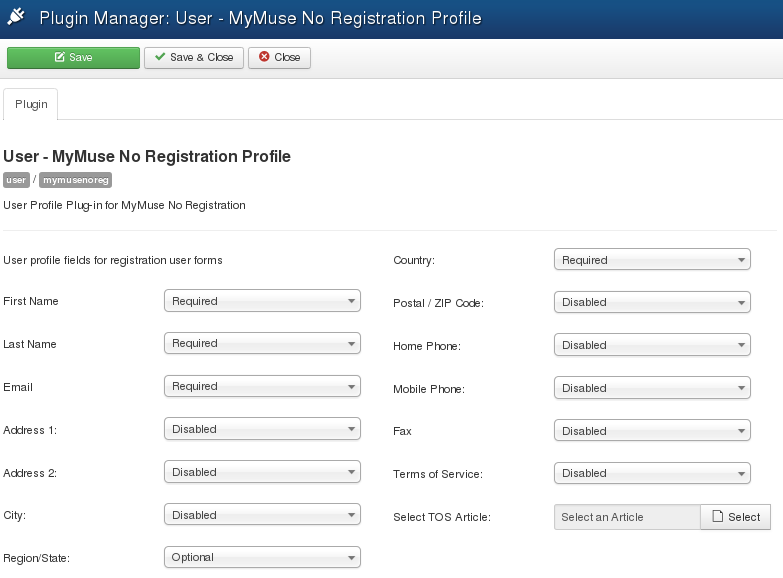
There are two groups of fields: one for Registration and admin user forms, the other for the Profile Edit Form.
Fields can be Required, Optional or Disabled.
Values are saved in the Notes section of orders.
Redirect on Login
Enable or not.
Search:
MyMuse Search
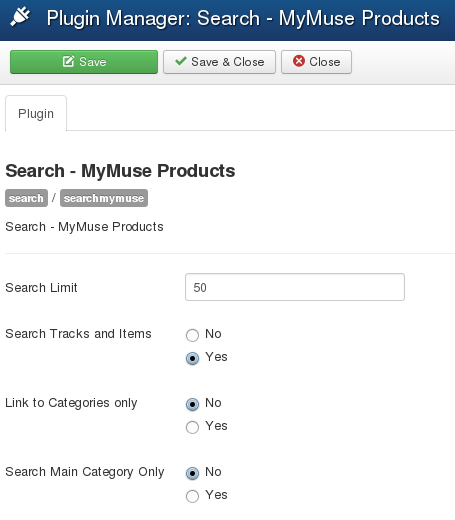
- Search Limit: The number of products to display
- Search Tracks and Items: Only: Include child items like tracks and items
- Link to categories: Return URL's to the category level
- Search Main Category Only: Search Main Category/Artist or All Categories
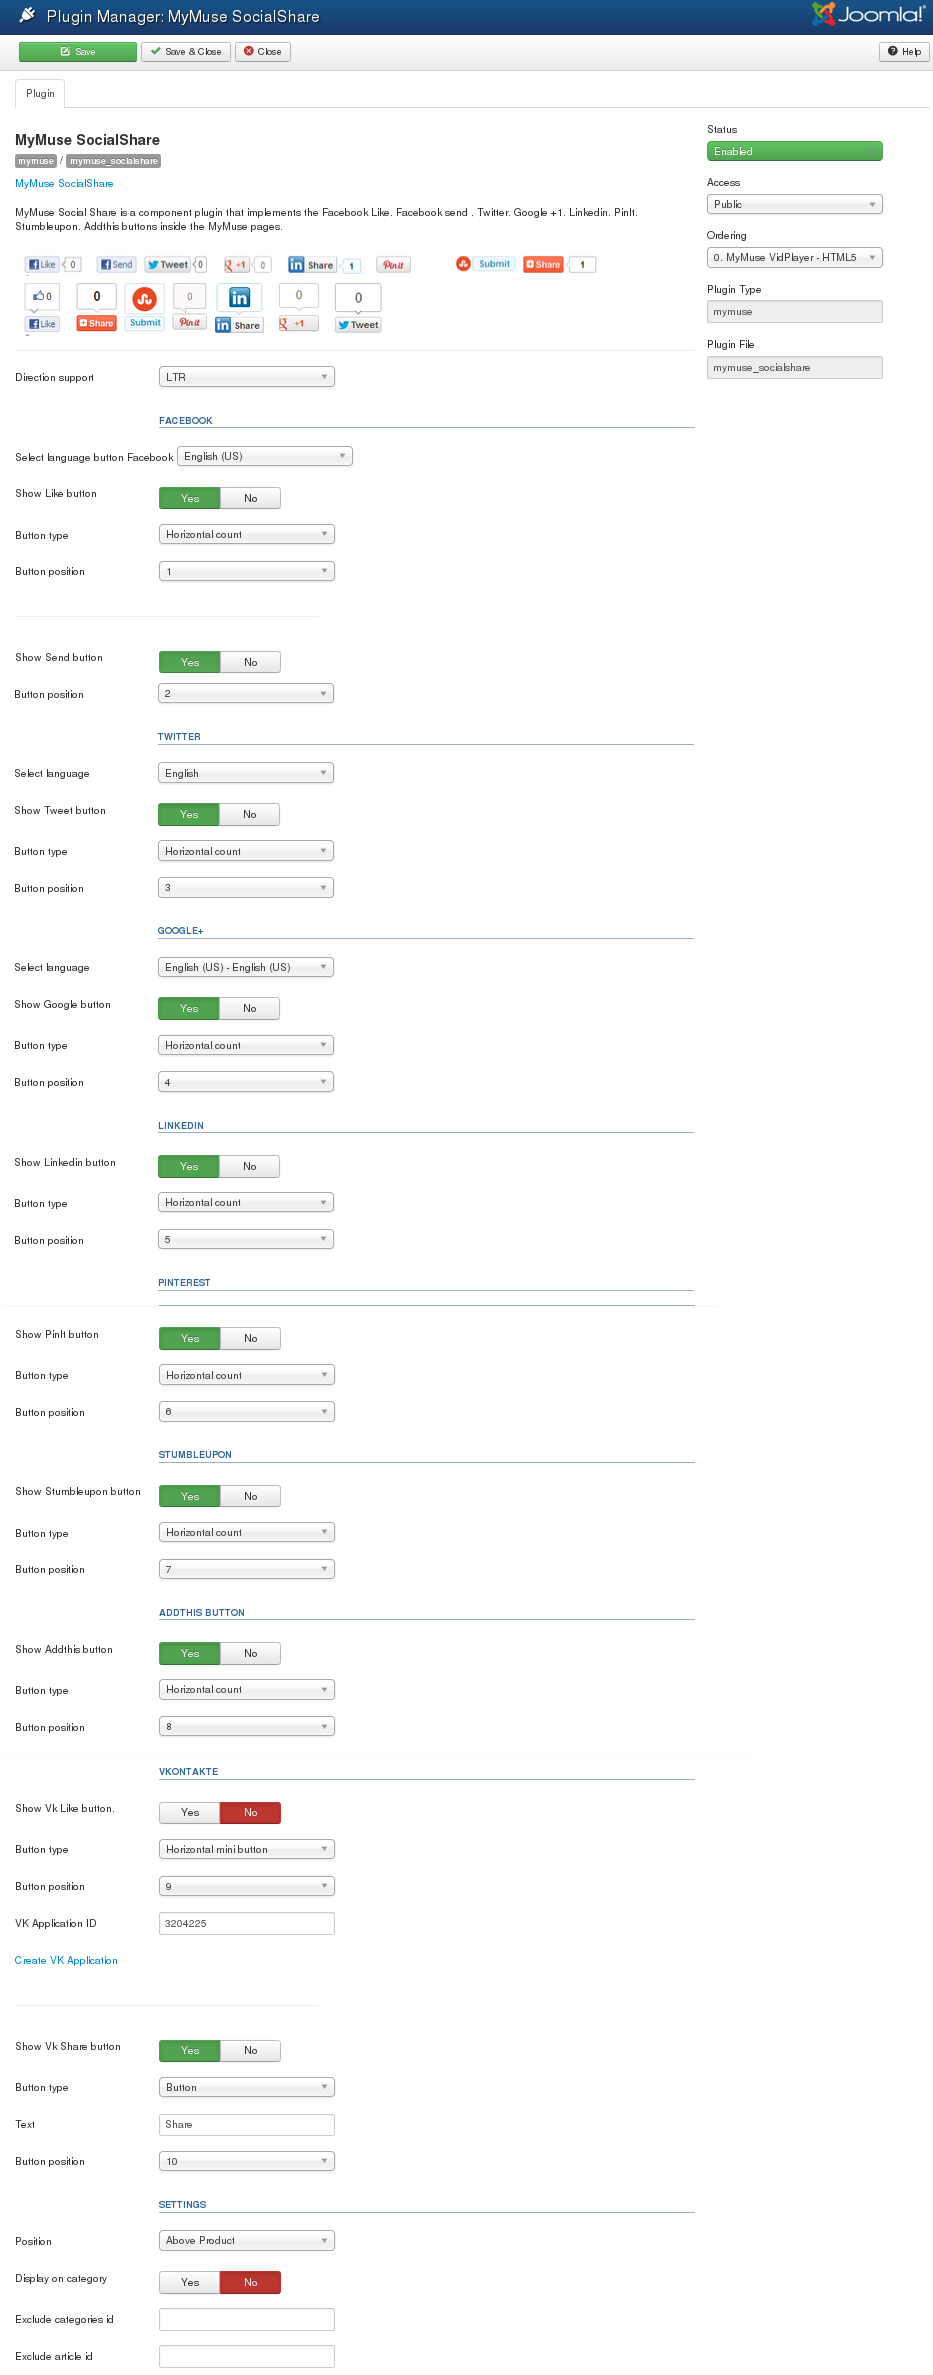
MyMuse Social Share is a component plugin that implements the Facebook Like, Facebook send , Twitter, Google +1, Linkedin, PinIt, Stumbleupon, Addthis, VK Like and VK Share buttons inside the MyMuse pages.
There are options for each social media. You can order the buttons with the Button Position options.
To use the VK Like button you must go to their site and create a web application. Copy the VK Application ID to here.
Settings
Direction Support: Left to Rigth or Right to Left
Position: One of Above Item Header, Below Item Header, Above Product, Above Item Comment.
Display on Category: Yes or No to display on Category pages.
Exclude Categories id: comma separated list of categories to exlude (Display on Category must be set to Yes)..
Exclude Product id: comma separated list of product ids to exclude.
Discount Plugin
You can offer discounts based on the number of units in the Cart or the Total amount of the cart, with different discounts for up to 12 ranges.
PLEASE NOTE: the discount plugin has only been tested on PayPal, PayPal Pro and PayPal express. If you are using another payment plugin let us know.
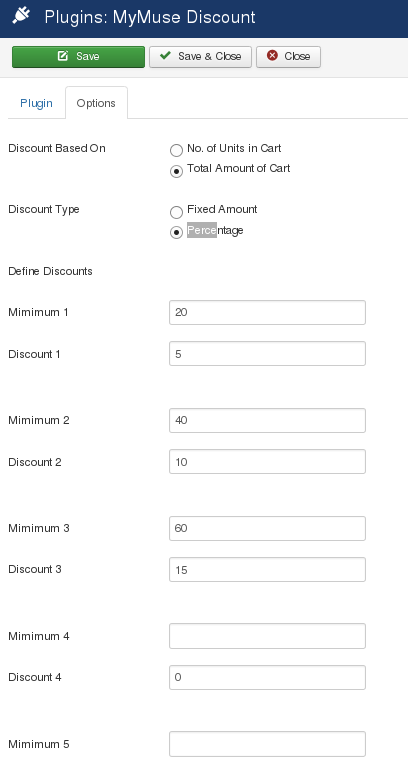
- Discount based on: Number of units in Cart or Total Amount of Cart.
- Discount Type: A fixed amount or a percentage.
- Minimum 1: If the units/total is over this number, the discount could apply.
- Discount 1: the amount/percentage of the discount.
- Minimum 2 .. 12, Discount 2 .. 12: Up to twelve ranges, the last one that matches applies.