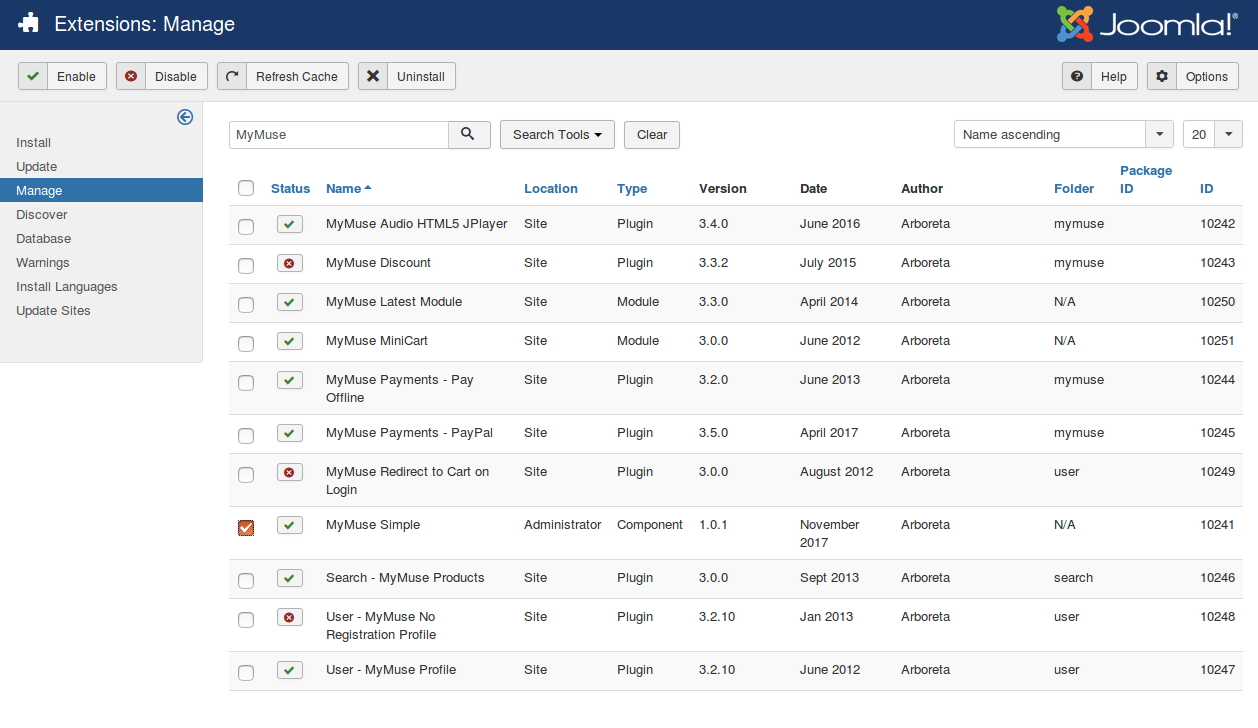
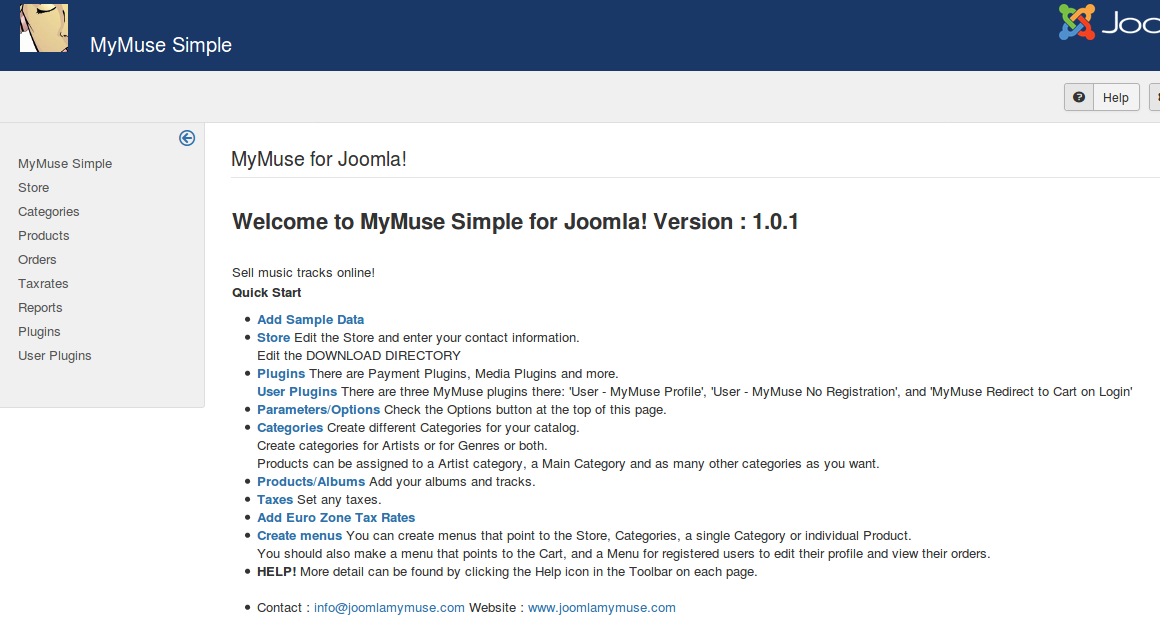
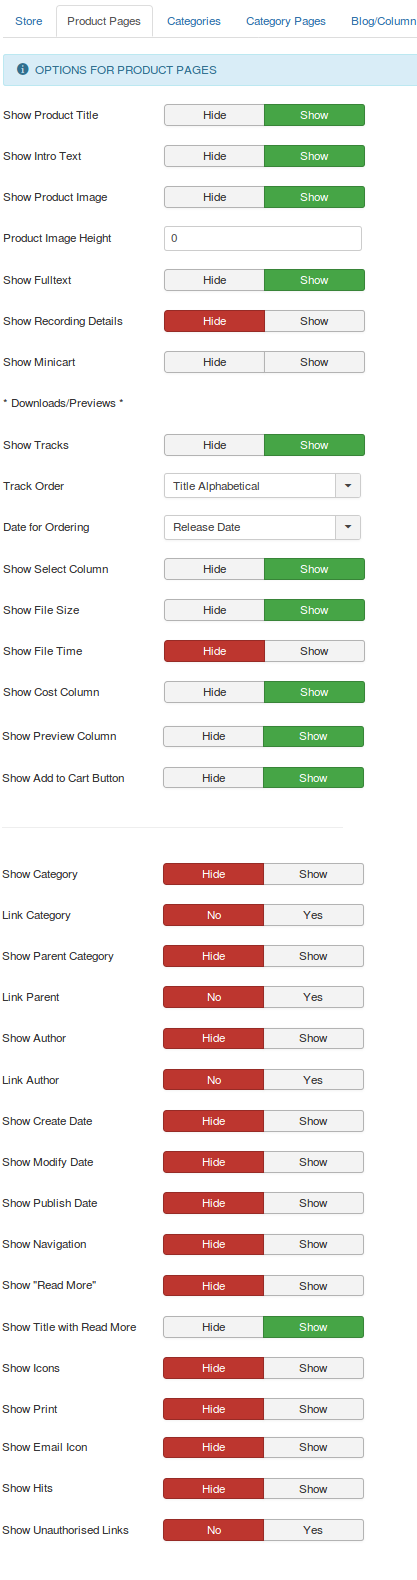
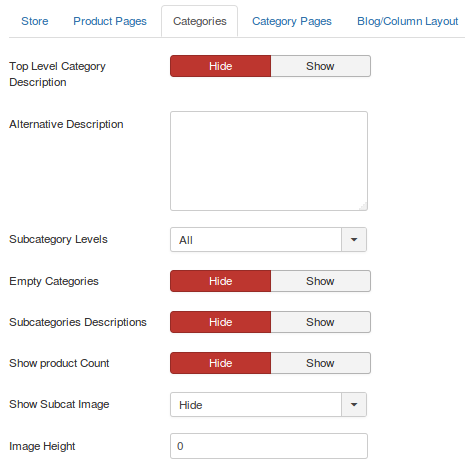
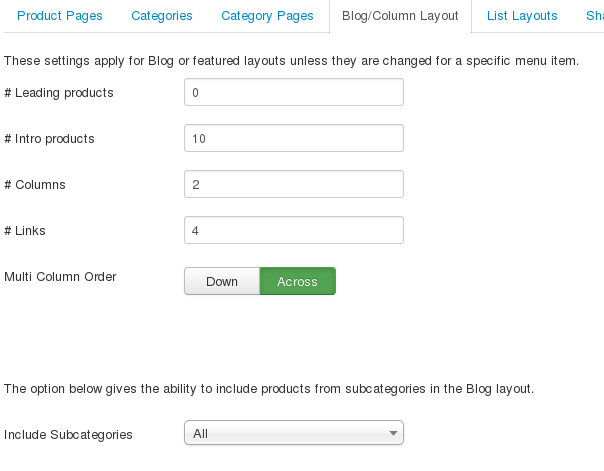
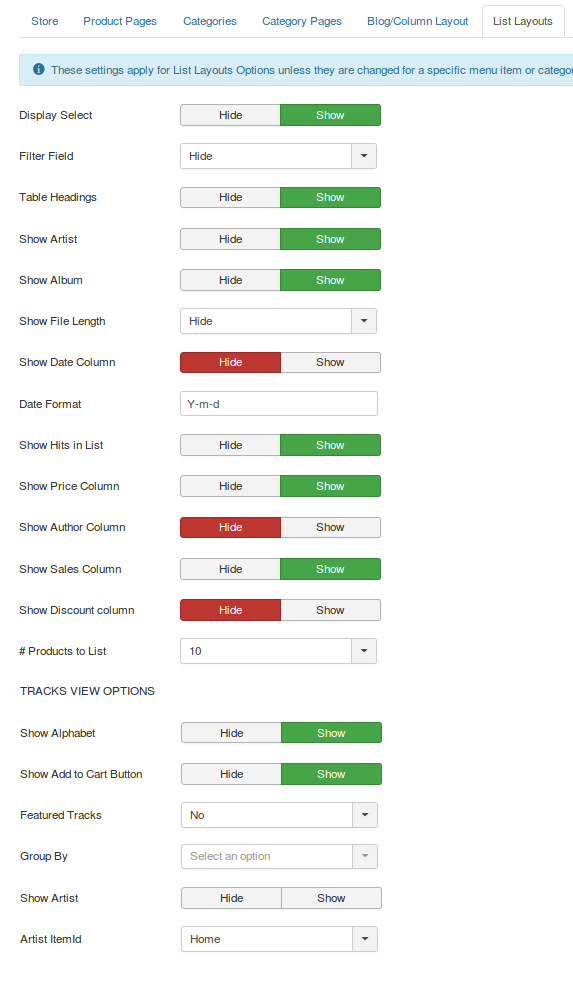
Plugins
MyMuse comes with several types of plugins.
Under User there are plugins for shopper profiles and redirect to cart.
Under Search there is a search plugin.
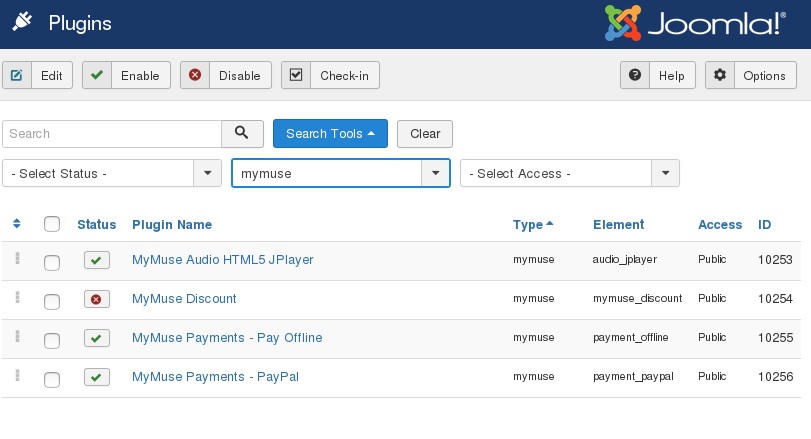
MyMuse Plugins Screenshot
Payment Plugins
Pay Offline
You can offer the option to pay offline, and confirm the order when the payment arrives, by publishing this plugin.
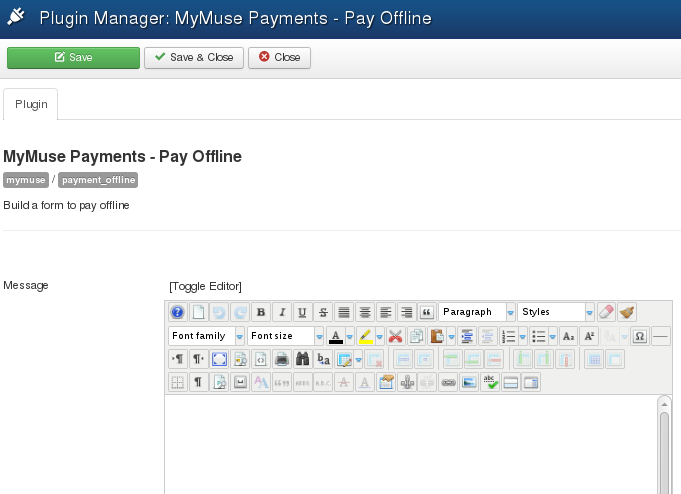
Options
- Message: an optional message to display beside the Pay Offline button.
Payment PayPal
Offer an option to pay at PayPal by publishing this plugin.
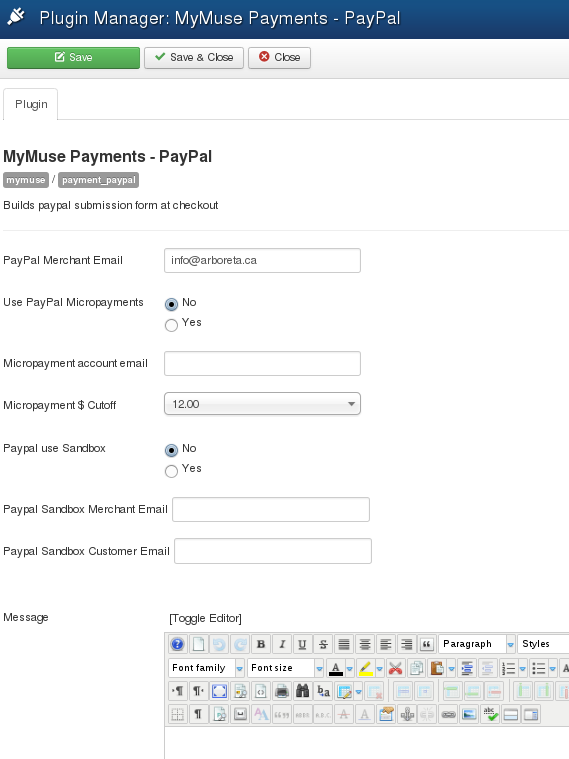
Options
- PayPal Merchant Email: your main PayPal email
- Use PayPal Micropayments: A micropayment Account gives a better deal on small payments. If you have two accounts, one as your main PayPal and one as your Micropayment Account, choose Yes here.
- Micropayment account email: enter your Micropayment Account email here.
- Micropayment $ Cutoff: The top amount that should go to the MicroPayment Account
- PayPal use Sandbox: Test PayPal in their Sandbox.
- Paypal Sandbox Merchant Email: Sandbox merchant email.
- PayPal Sandbox Customer Email: Optionsl Sandbox customer email.
- Message: A message to include in email to the customer
Audio Previews
Audio HTML5
Use JPlayer to present your previews using HTML5. For browsers that do not support your previews it will fall back to a flash player. More information on HTML5 is available here. The Jplayer can be styled using css files in plugins/mymuse/audio_html5/skins
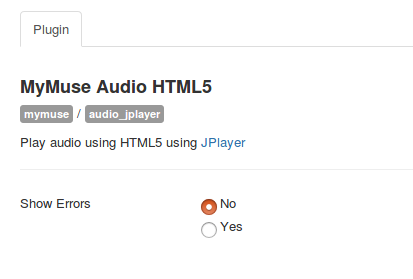
Options
- Show Errors: The JPlayer has an element called "Jplayer Inspector" that can be shown by turning on "Show Errors"
The JPlayer

User Plugins:
User MyMuse Profile

There are two groups of fields: one for Registration and admin user forms, the other for the Profile Edit Form.
Fields can be Required, Optional or Disabled.
Special fields are:
- Shopper Group: Leave Required. Shopper Groups only available in the Pro Version.
- Category Owner: Leave Disabled. Category Owner only available in the Pro Version.
User - MyMuse No Registration Profile
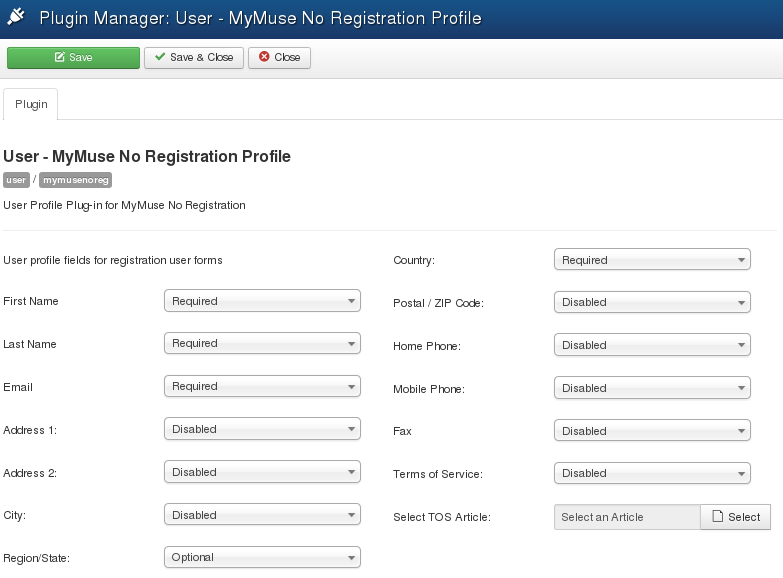
There are two groups of fields: one for Registration and admin user forms, the other for the Profile Edit Form.
Fields can be Required, Optional or Disabled.
Values are saved in the Notes section of orders.
Redirect on Login
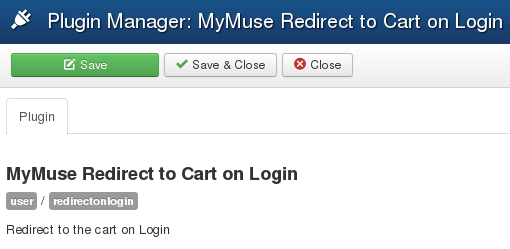
Enable or not.
Search:
MyMuse Search
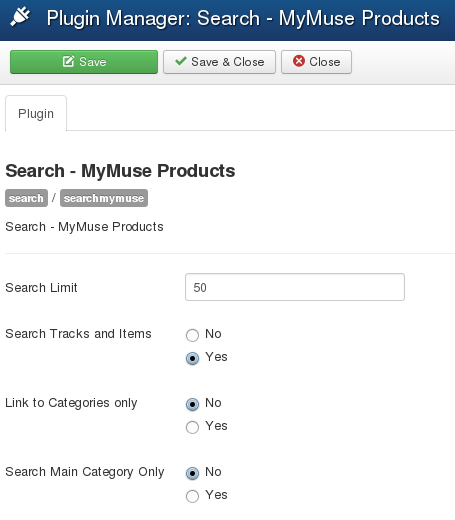
- Search Limit: The number of products to display
- Search Tracks and Items: Only: Include child items like tracks and items
- Link to categories: Return URL's to the category level
- Search Main Category Only: Search Main Category/Artist or All Categories
Discount Plugin
You can offer discounts based on the number of units in the Cart or the Total amount of the cart, with different discounts for up to 12 ranges.
PLEASE NOTE: the discount plugin has only been tested on PayPal, PayPal Pro and PayPal express. If you are using another payment plugin let us know.
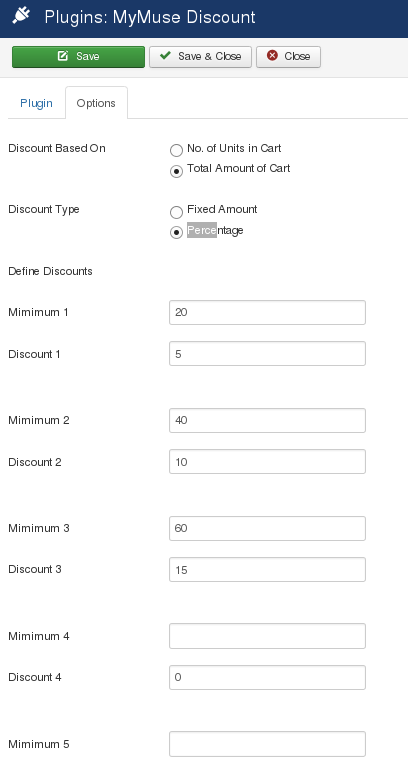
- Discount based on: Number of units in Cart or Total Amount of Cart.
- Discount Type: A fixed amount or a percentage.
- Minimum 1: If the units/total is over this number, the discount could apply.
- Discount 1: the amount/percentage of the discount.
- Minimum 2 .. 12, Discount 2 .. 12: Up to twelve ranges, the last one that matches applies.